
Requirements Gathering
Last updated on 2026-06-25 | Edit this page
Estimated time: 60 minutes
Overview
Questions
- How do we capture requirements?
- How do we prioritise requirements?
Objectives
- Get hands-on experience of breaking down a Request document into requirements.
- Learn how to state requirements as Stories and Tasks and add these to a GitHub Project.
- Know how to prioritise a list of requirements using GitHub Project labels and fields.
- Learn about how we use Epics to represent larger bodies of work.
Please make sure, when acting as the Product Owner, that team members
work on different .md files during the exercise so assign
them work that follow this. Since we won’t be using branches or pull
requests, having multiple people edit the same file could cause merge
conflicts.
For example:
- Person 1 works on
italian-recipe.md - Person 2 works on
indian-recipe.md - Person 3 works on
british-recipe.md
This way, everyone can work independently without overwriting each other’s changes.
3.1. Introduction
As covered in the Agile Fundamentals course in the Product Discovery chapter,
“In Agile, projects don’t start with long requirement documents. Instead, they begin with a Product Vision. The Product Vision explains the purpose of the product, the value it should deliver, and the people it is intended to serve.”
Building on that knowledge from basic Agile, in our research environments where Agile is not yet an established practice in research teams and academia, requests from our customers/academics may arrive in various forms. For example, in our RSE department at the University of Manchester, the initial scope of a project, along with high-level stakeholder needs, is captured in an RSE Request Document completed at the beginning of the demand process. This document is used by us to communicate a likely scope for the project to researchers and includes the initial costing for the service. After a project kicks off, this scoping document forms the basis of the initial population of the backlog with more granular Issues.
You may follow different strategies for gathering requirements from your customers depending on your department’s existing workflows and organisational context.
For this course, we have created a request document that mimics the less formally structured requirements often seen in research environments where Agile practices are not yet well established. Rather than providing a formal Agile Product Vision, customers may instead supply requirements in a simple document format. During this course, you will use this document to extract and interpret the customer requirements.
Also, as we learned in the Agile Fundamentals course, the Product Owner (P.O.) represents the needs of stakeholders and is responsible for defining and owning end-user requirements. The P.O. then breaks these requirements down into a set of high-level, prioritised User Stories and Tasks, which we will see in this chapter how to enter as new items in the GitHub Project.
These items (known as Issues in GitHub terminology) can also be linked to larger bodies of work called Epics. The GitHub Project template that you will be using during this course provides custom fields for assigning Issues to Epics.
As part of Sprint Planning, the Development Team will use the Issues developed by the Product Owner to generate more granular tasks for them to complete during a Sprint.
3.2. Requirements Prioritisation using MoSCoW
As we learned in the Agile Fundamentals course, requirements need to be prioritised by the Product Owner (P.O.) to prepare the product backlog for the sprint planning meeting. There are many prioritisation frameworks [you can see list here], but the one we learned and used in the Agile Fundamentals course is MoSCoW, which we will also use in this course. Please see the Prioritise Stories using MoSCoW section in the Agile Fundamentals Course for more details or for recap.
As a quick recap, MoSCoW stands for:
- Must have
- Should have
- Could have
- Won’t have
As the purpose of this course is to help you become proficient in using GitHub as a tool for Agile project management, when the time comes to translate requirements into GitHub Issues, the template project you have been provided includes a custom field for categorising Issues using the MoSCoW prioritisation method.
Challenge 1: Understanding the Product (15 minutes)
Your facilitator will act in the Product Owner (PO) role.
-
They will provide you with the Request Document, which contains the product details. Your tasks are to:
- Read and understand the project.
- Identify and note down the key requirements and any assumptions you make on paper.
- Ask the Product Owner clarifying questions if any requirements are unclear.
Scrum Masters: Ensure that all team members are actively involved in the discussion and have an opportunity to contribute.
3.3. Epics
As we learned in the Agile Fundamentals course under the Identify Epics (Steps) from User Activities section, Epics are large bodies of work that take multiple sprints to complete. They could be considered “meta-issues” but should not be represented as Issues at all as they can span multiple sprints. The GitHub project template created by course authors that you will be using during this course provides custom fields for assigning Issues to Epics.
3.4. Breaking Requirements Down into User Stories and Tasks
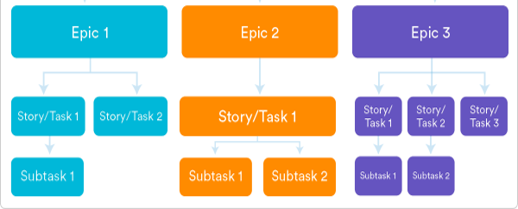
Figure source: https://www.atlassian.com/agile/project-management/epics-stories-themes
Next we can begin to consider how these high-level requirements can be translated into Issues residing in our GitHub Project. In Scrum, Functional Requirements are expressed as User Stories, requirements written from the perspective of an end-user.
A User Story Template and Some Examples
What defines a User Story is the way it is expressed. As a recap from the Agile Fundamentals course under the Identify Epics (Steps) from User Activities section, User Stories should use a consistent structure:
As a <user role>,
I want <activity>
so that <business value>- As a postgrad, I want to collaborate with fellow students on the system to run analyses on the data.
- As a researcher, I want to calibrate our model by uploading existing data sets as text files.
- As a manager, I want to be able to view my colleagues progress graphically, so I can better report our success and failures.
Where possible, requirements must be written as user stories and recorded in the Issue tracker of the relevant repository. These should be marked as a user story using the label provided in the repository provided to you by your course facilitator. As well as user stories, all tasks (things that need to be done that cannot be expressed as a user story) must be recorded on Backlog on the GitHub Issue tracker associated with the project. Issues must have clear titles and enough detail in their descriptions to make it clear.
3.5. Definition of Done
Since you have already completed the ‘Team Definition of Done’ exercise in the Agile Fundamentals course and are aware of what the team’s “Definition of Done” is, we won’t repeat that excercise here.
NOTE: For the purposes of this course, your Definition of Done is that each task must be peer reviewed before its status is changed to Done on the GitHub project board.
Clearly communicate to participants what the Definition of Done is for this course, and keep reminding them throughout. Since the course is short, we will not repeat what they learned in the Agile Fundamentals course, and instead will provide a pre-defined Definition of Done.
3.6. Adding Stories, Tasks and Epics to our GitHub Project
The new GitHub Project that you created during the Set-Up does not yet contain any Issues. The next step is to add the high-level User Stories and Tasks that the Product Owner has created, to the Product Backlog. In practice, they are added as Issues to the new GitHub Project. These can also be assigned to larger Epics if required using the custom field.
An Issue in GitHub Projects is a generic term for User Stories and Tasks in the Product Backlog. In other words, a Tasks and a User Story are types of Issues.
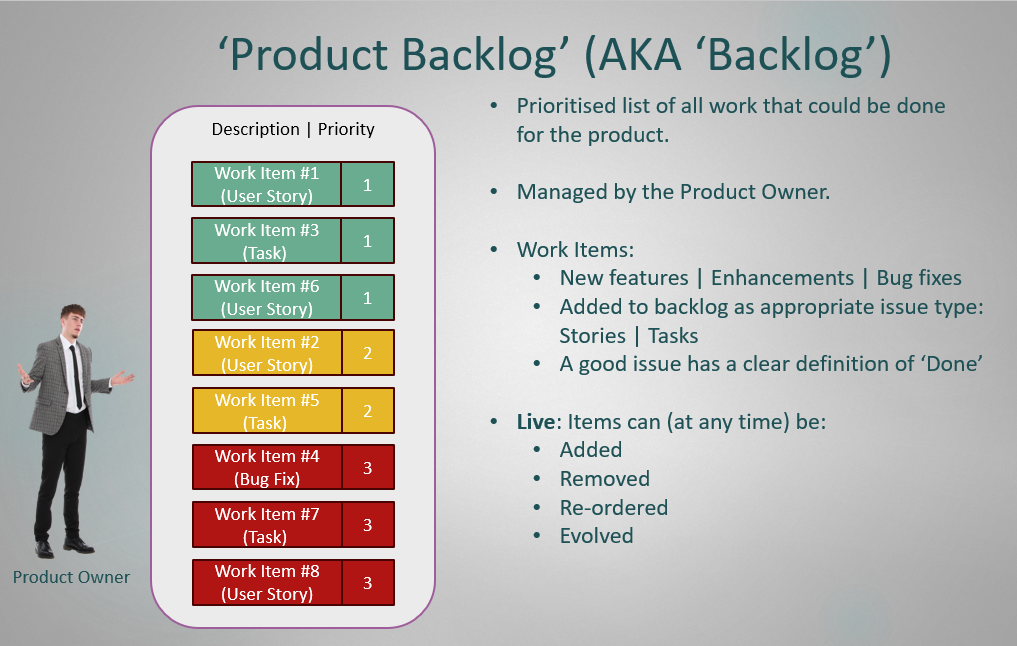
To add a new Issue, go to your GitHub Project, find the Product Backlog view and then click on the ‘+’ symbol next to “Add Item” text and click on “Create a New Issue”. If adding an Issue directly in the project view like this you will see that it is created as a “draft” or note to begin with. You must convert these drafts into Issues as soon as possible. In the side panel displayed when the Issue is clicked you can select “Convert to Issue” to assign the Issue to a repository and enabled all the options.
Examples of User Stories for the Micro Project
Below is an example of some User Stories that have been generated from the request document. These are written in the User Story style and map directly onto one of the stakeholder needs in the request document. They may all be considered to be part of an Epic called “Project Setup & Content Standards”.
| Req. # (from request doc) | Task Detail |
|---|---|
| 1 | As a contributor, I want a standard Markdown recipe template, so that all recipes are consistent and easy to edit and publish |
| 1 | As a project editor, I want a defined folder and filename structure, so that recipes are easy to organise and locate by cuisine. |
| 1 | As a contributor, I want clear submission guidelines, so that I know how to format and submit my recipe correctly. |
It is important to write clear titles and descriptions for all Issues being added. If you need to add an Issue quickly, you can begin with just a title, but other details should be added as early as possible. For example, a good description that makes it clear what the Issue is about and what its Definition of Done is.
Challenge 2: Building and Prioritising the Product Backlog on GitHub (20 minutes)
The facilitator, acting as the Product Owner (PO), has already created several requirements as GitHub Issues in the repository provided to you. Your task is to add these Issues to your GitHub Project for the Collaborative Multicultural Recipe Book project.
-
Add Stories and Tasks to GitHub Project:
Open your GitHub Project for the Collaborative Multicultural Recipe Book.
Use the “ + Add Item” button to add Stories and Tasks to the Product Backlog.
-
As in this instance, the P.O. has already created some issues, you can add these directly to your project
- After clicking on the +, select Add item from repository
- This will open a window giving you the pre-populated user stories which you can now add
- You are free to edit any of these issues if your conversation with the P.O. leads to a change in requirements
-
These Stories and Tasks include:
- Clear titles
- Descriptions with sufficient detail
- A clear Definition of Done for each story/task
-
Assign MuSCoW Priorities:
- Each Issue has a MuSCoW field: “Must have”, “Should have”, “Could have”, “Won’t have”.
- Assign the appropriate MuSCoW value to each Issue.
- Feel free to ask the Stakeholders (represented by the Facilitators) their thoughts about the level of priority for each Issue if you are unsure.
Adding or Updating Requirements:
- You may add new requirements that emerge during discussions with stakeholders (represented by the facilitators), alongside reviewing and re-prioritising the existing requirements using the MoSCoW method.
- Any requirements identified during Challenge 1 that are not already included in the pre-populated GitHub Issues can be created as new issues and added to the GitHub repository.
Further Instructions:
- Scrum Masters: Ensure that all members of the team are involved.
The steps in this course may feel different to you from the Agile Fundamentals course, but remember that the purpose of this course is not to repeat the Agile Fundamentals course. You have already learned core Agile principles there. Since this is a one-day course, our focus is instead on how we can use GitHub as a tool for Agile project management, allowing more time to practice GitHub features while still applying Agile concepts at a higher level.
3.7. Further Prioritisation and Categorisation of Issues on GitHub Project
It is up to the Scrum Team how items in the Product Backlog are prioritised and what system is used, and the Product Owner has the final say. Each Issue could be assigned a “priority”, which shows its level of urgency and which can be a number, or text categories. The template project already has a “Priority” field with “High”, “Medium” and “Low” values included. To further categorise Issues, descriptors could also be added as new labels, to the “Labels” field.
To add further labels to the labels field: Visit the repository connected to your GitHub Project, and select either “Pull Requests” or “Issues”. In the top right-hand corner, select “Labels” to see a list of all existing labels, and then select “New Label”. Note that labels live in a repository and are not syncrhonised across repositories in a project.
To view a list of all available fields: Click on the “+” symbol at the right-hand end of the column headers, (in the “Product Backlog” view). This will show a drop-down menu of all “Visible fields” and “Hidden fields” and these can be toggled to change visibility.
To add a new field: The option to add a new field (“+ New Field”) is also included in the drop-down menu of available fields, described above.
To edit or delete fields: Click on the ellipse (“…”) symbol next to the field’s title, in the column header.
How can we add Epics into our GitHub Project?
An Epic field already exists in the template project, but each Scrum Team must replace the placeholder values with the relevant titles and descriptions for that project. When editing the Epic field’s options in the GitHub Project settings, each individual option should be given a short title but the description of the option can be used to express the Epic (using a user story sentence structure if necessary) or simply to add detail to what the Epic is about e.g. Title: “Implement UI”; Description: “As a user, I would like to interact with a graphic user interface, so non-technical people can use the software”
1. Create additional labels
Add new labels to help organise your Issues.
For example:
- Italian Cuisine
- Recipe Formatting
- Translation
Use labels to group related work items.
2. Update Epics
- Review the existing Epics in your project
- Replace placeholder names with meaningful Epic titles for your project
- Ensure Epics reflect major areas of work (e.g. cuisine types, recipe themes, or project structure)
Our Product Backlog is now up to date with the latest set of requirements from the users broken down into “User Stories” and “Tasks” (and represented as Issues in GitHub). The first sprint is almost ready to begin, but first we need a Sprint Planning Meeting, to select a subset of these Issues to go into the Sprint Backlog, the set of items that will be worked on during this sprint.
- In this course Request document forms the basis for gathering requirements.
- We can use the MuSCoW strategy to help Stakeholders to prioritise the list of requirements.
- Requirements are broken down into User Stories and Tasks which are added to the GitHub Project as Issues.
- The new Issues added to the Product Backlog must to be prioritised, led by the Product Owner.
- Issues can be categorised further by using a variety of fields, for example the “Labels” field.
- Epics are larger bodies of work, spanning multiple sprints (possibly multiple projects). A custom “Epic” field exists to allow Issues to be assigned to an owning Epic.