
Last updated on 2026-06-08 | Edit this page
📖 Quick Guide: Working Directly in GitHub
This guide will show you how to create and update your project files entirely inside your web browser. No Repo cloning or downloading required!
Part 1: How to Create a New File Using the Template
Follow these steps when you need to create a brand new project file for the first time.
Step 1: Copy the Template Text
- Open your team repository on GitHub.
- Click on the
templatefile to open it. - Highlight all the text inside the template, right-click, and select
Copy (or use
Ctrl+C/Cmd+C). - Click your repository’s name at the top left to go back to your main folder.
Step 2: Go Inside Your Target Folder
- Look at your file list and click on the specific
folder where your file belongs (for example: the
recipesordocumentationfolder). - Make sure you are inside the folder before moving to the next step!
Step 3: Create the New File
- Now that you are inside the correct folder, click the Add file button near the top right.
- Select Create new file from the dropdown menu.
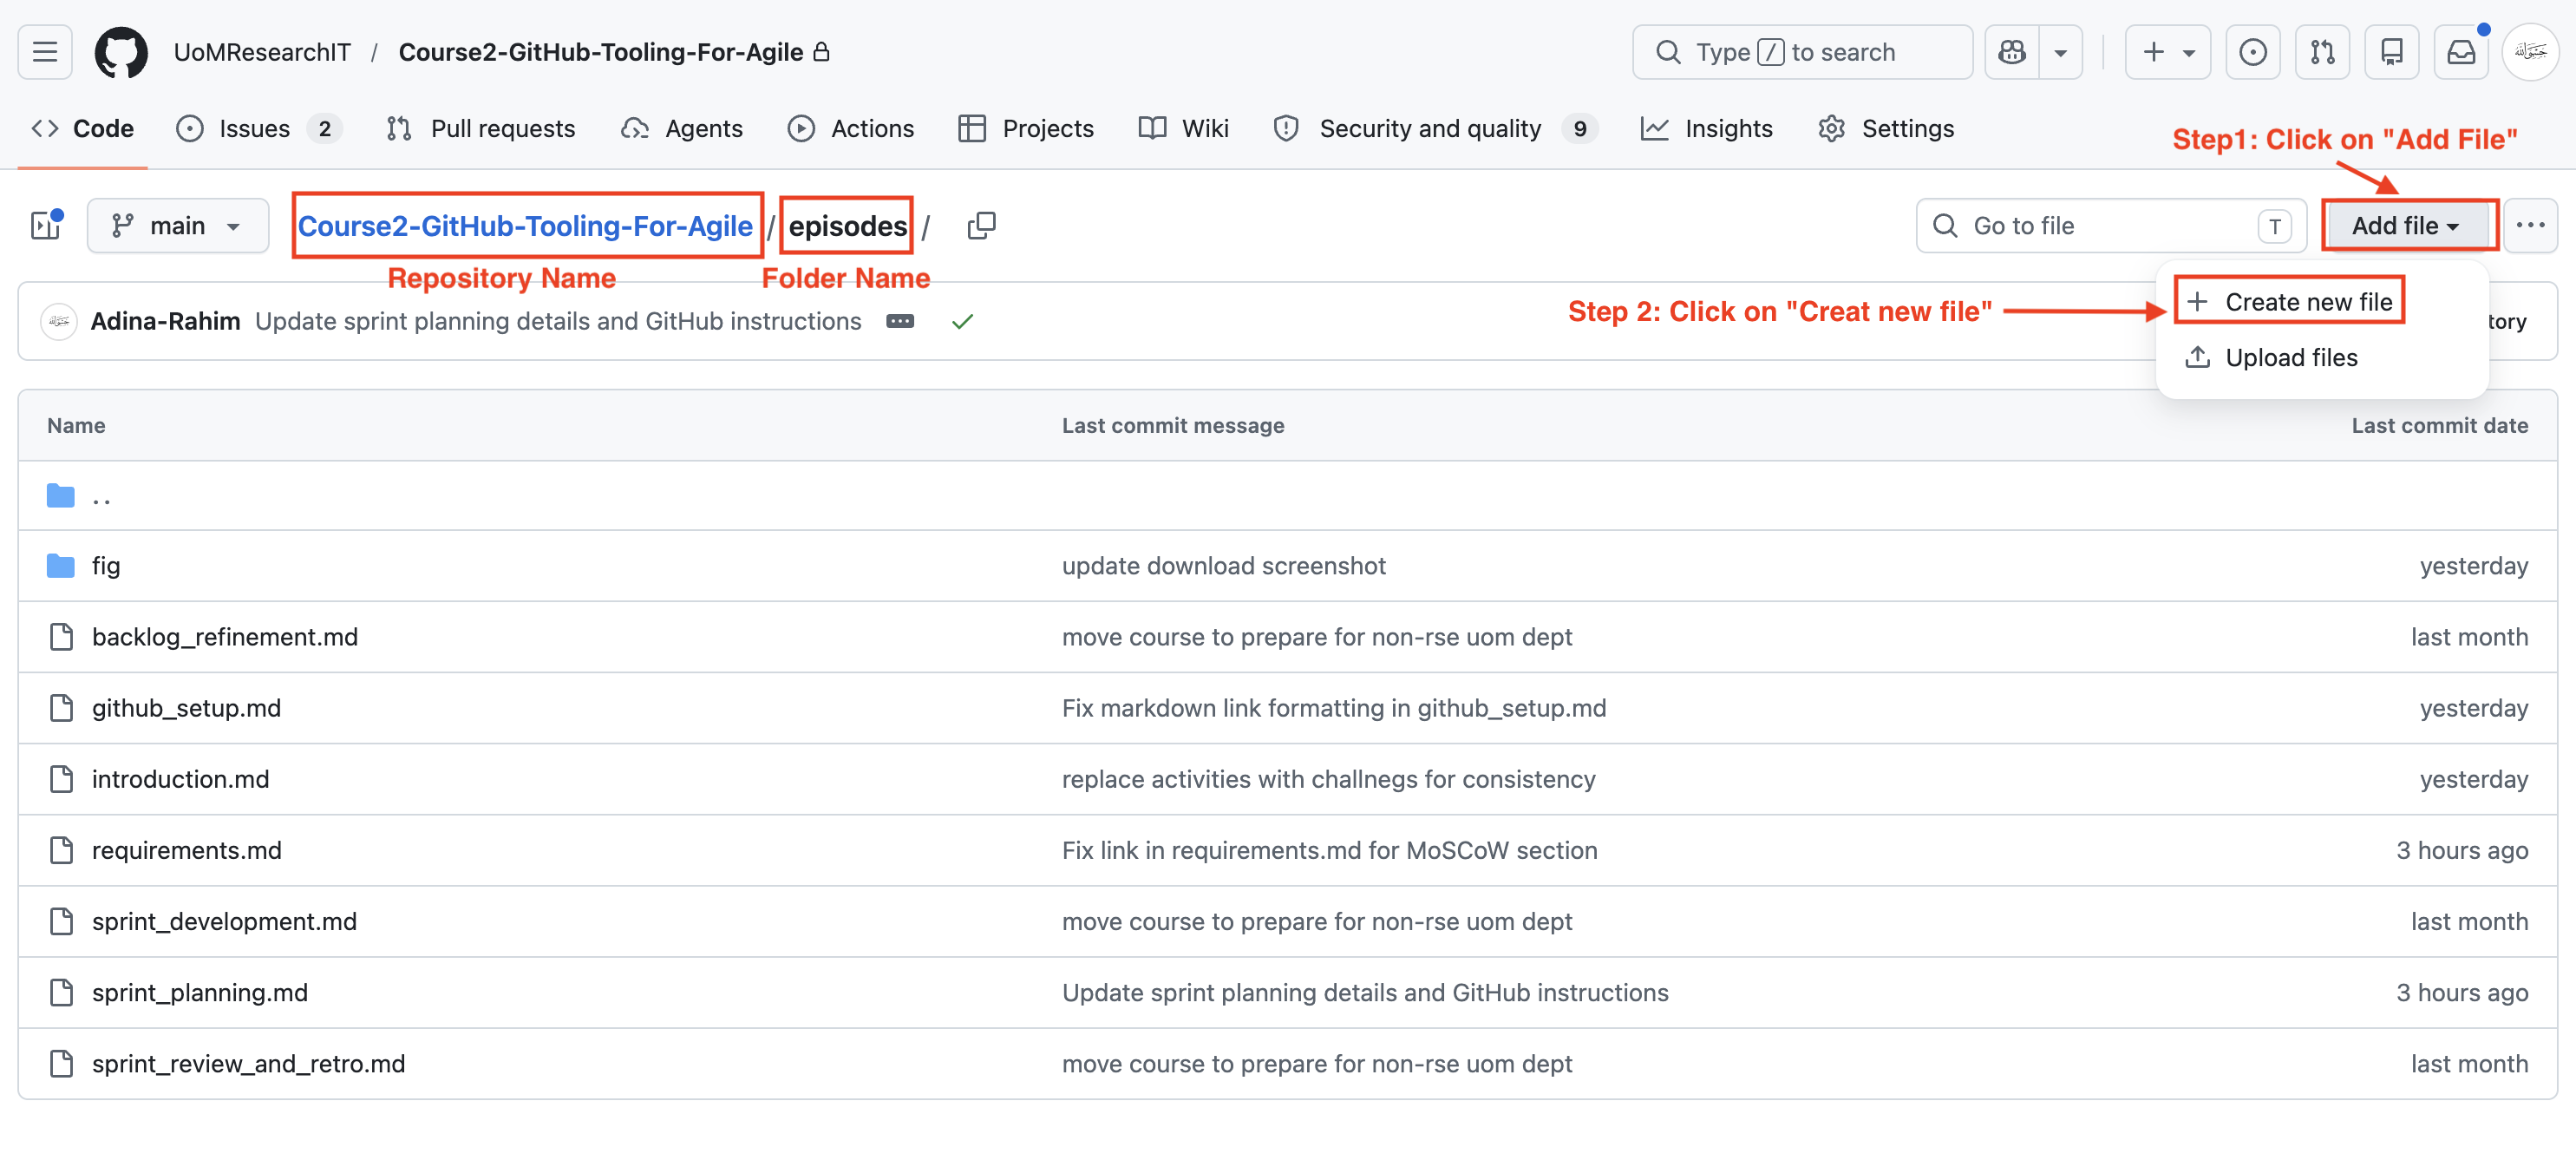
Create File
Step 4: Name Your File and Paste the Template
- In the box labeled Name your file…, type your new file name.
-
⚠️ CRITICAL STEP: You must type
.mdat the very end of your file name (for example:project-update.md).
- Click into the big blank text box below the file name.
- Right-click and select Paste (or use
Ctrl+V/Cmd+V) to drop your template layout inside.
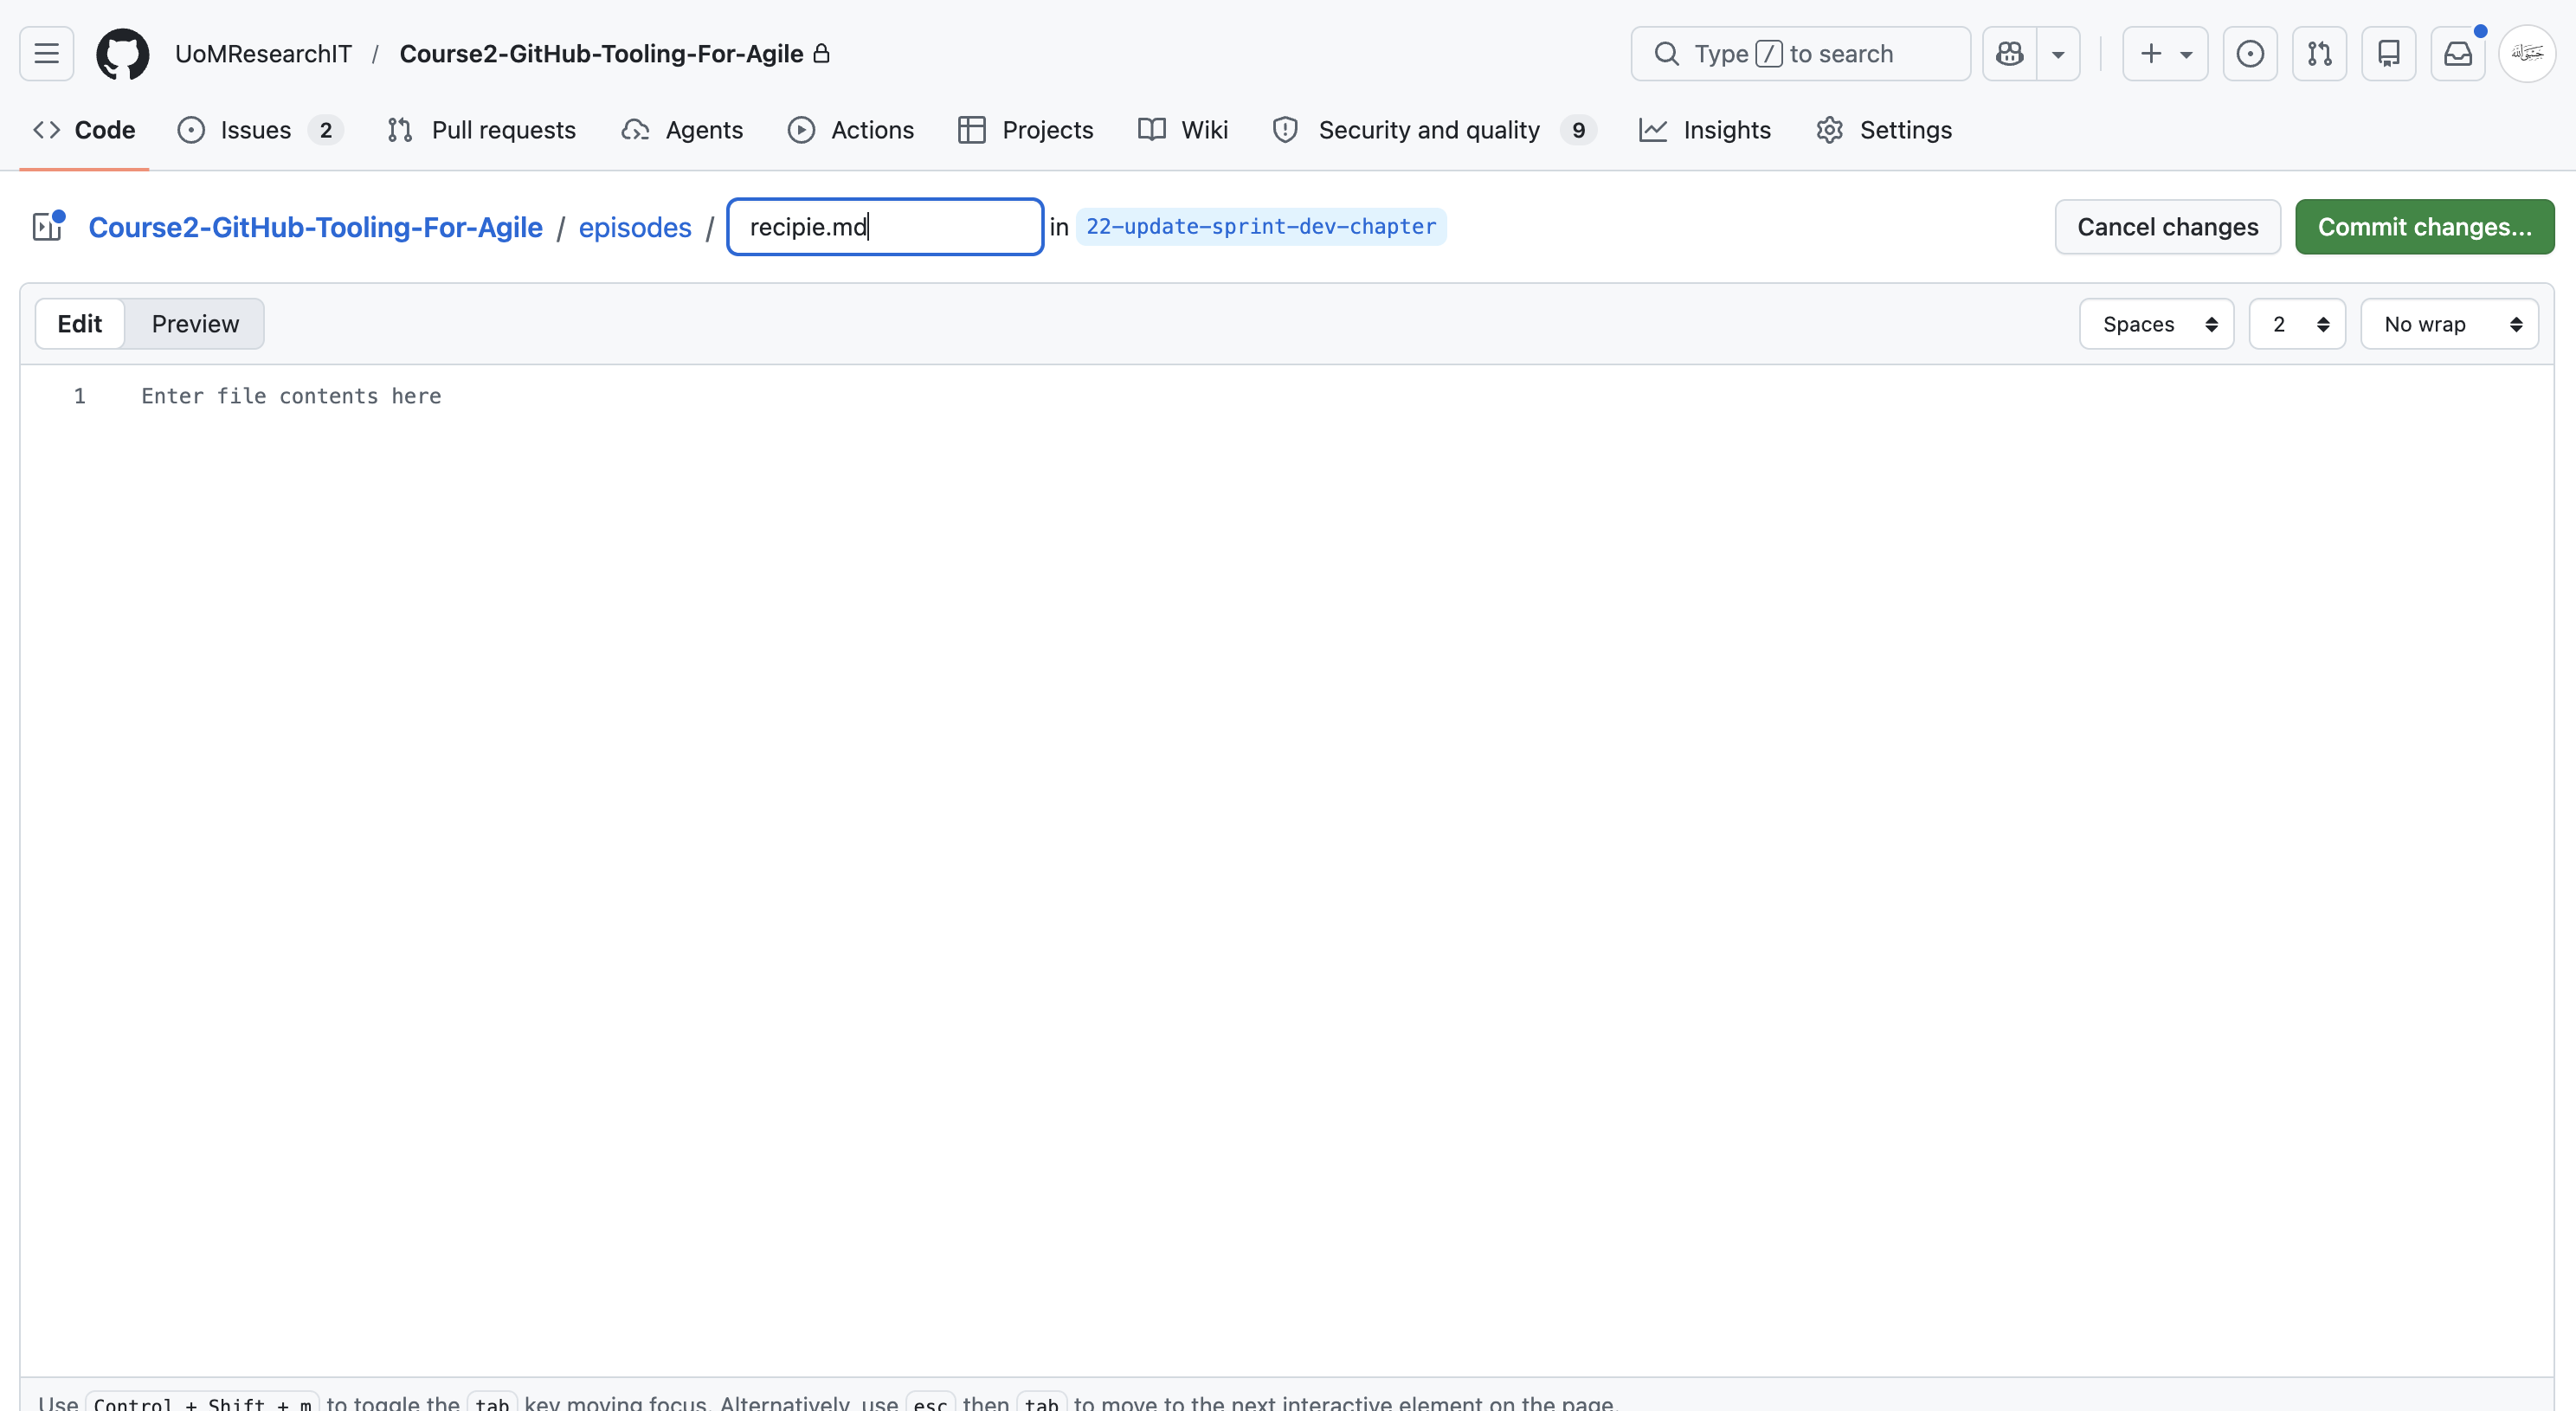
Name File
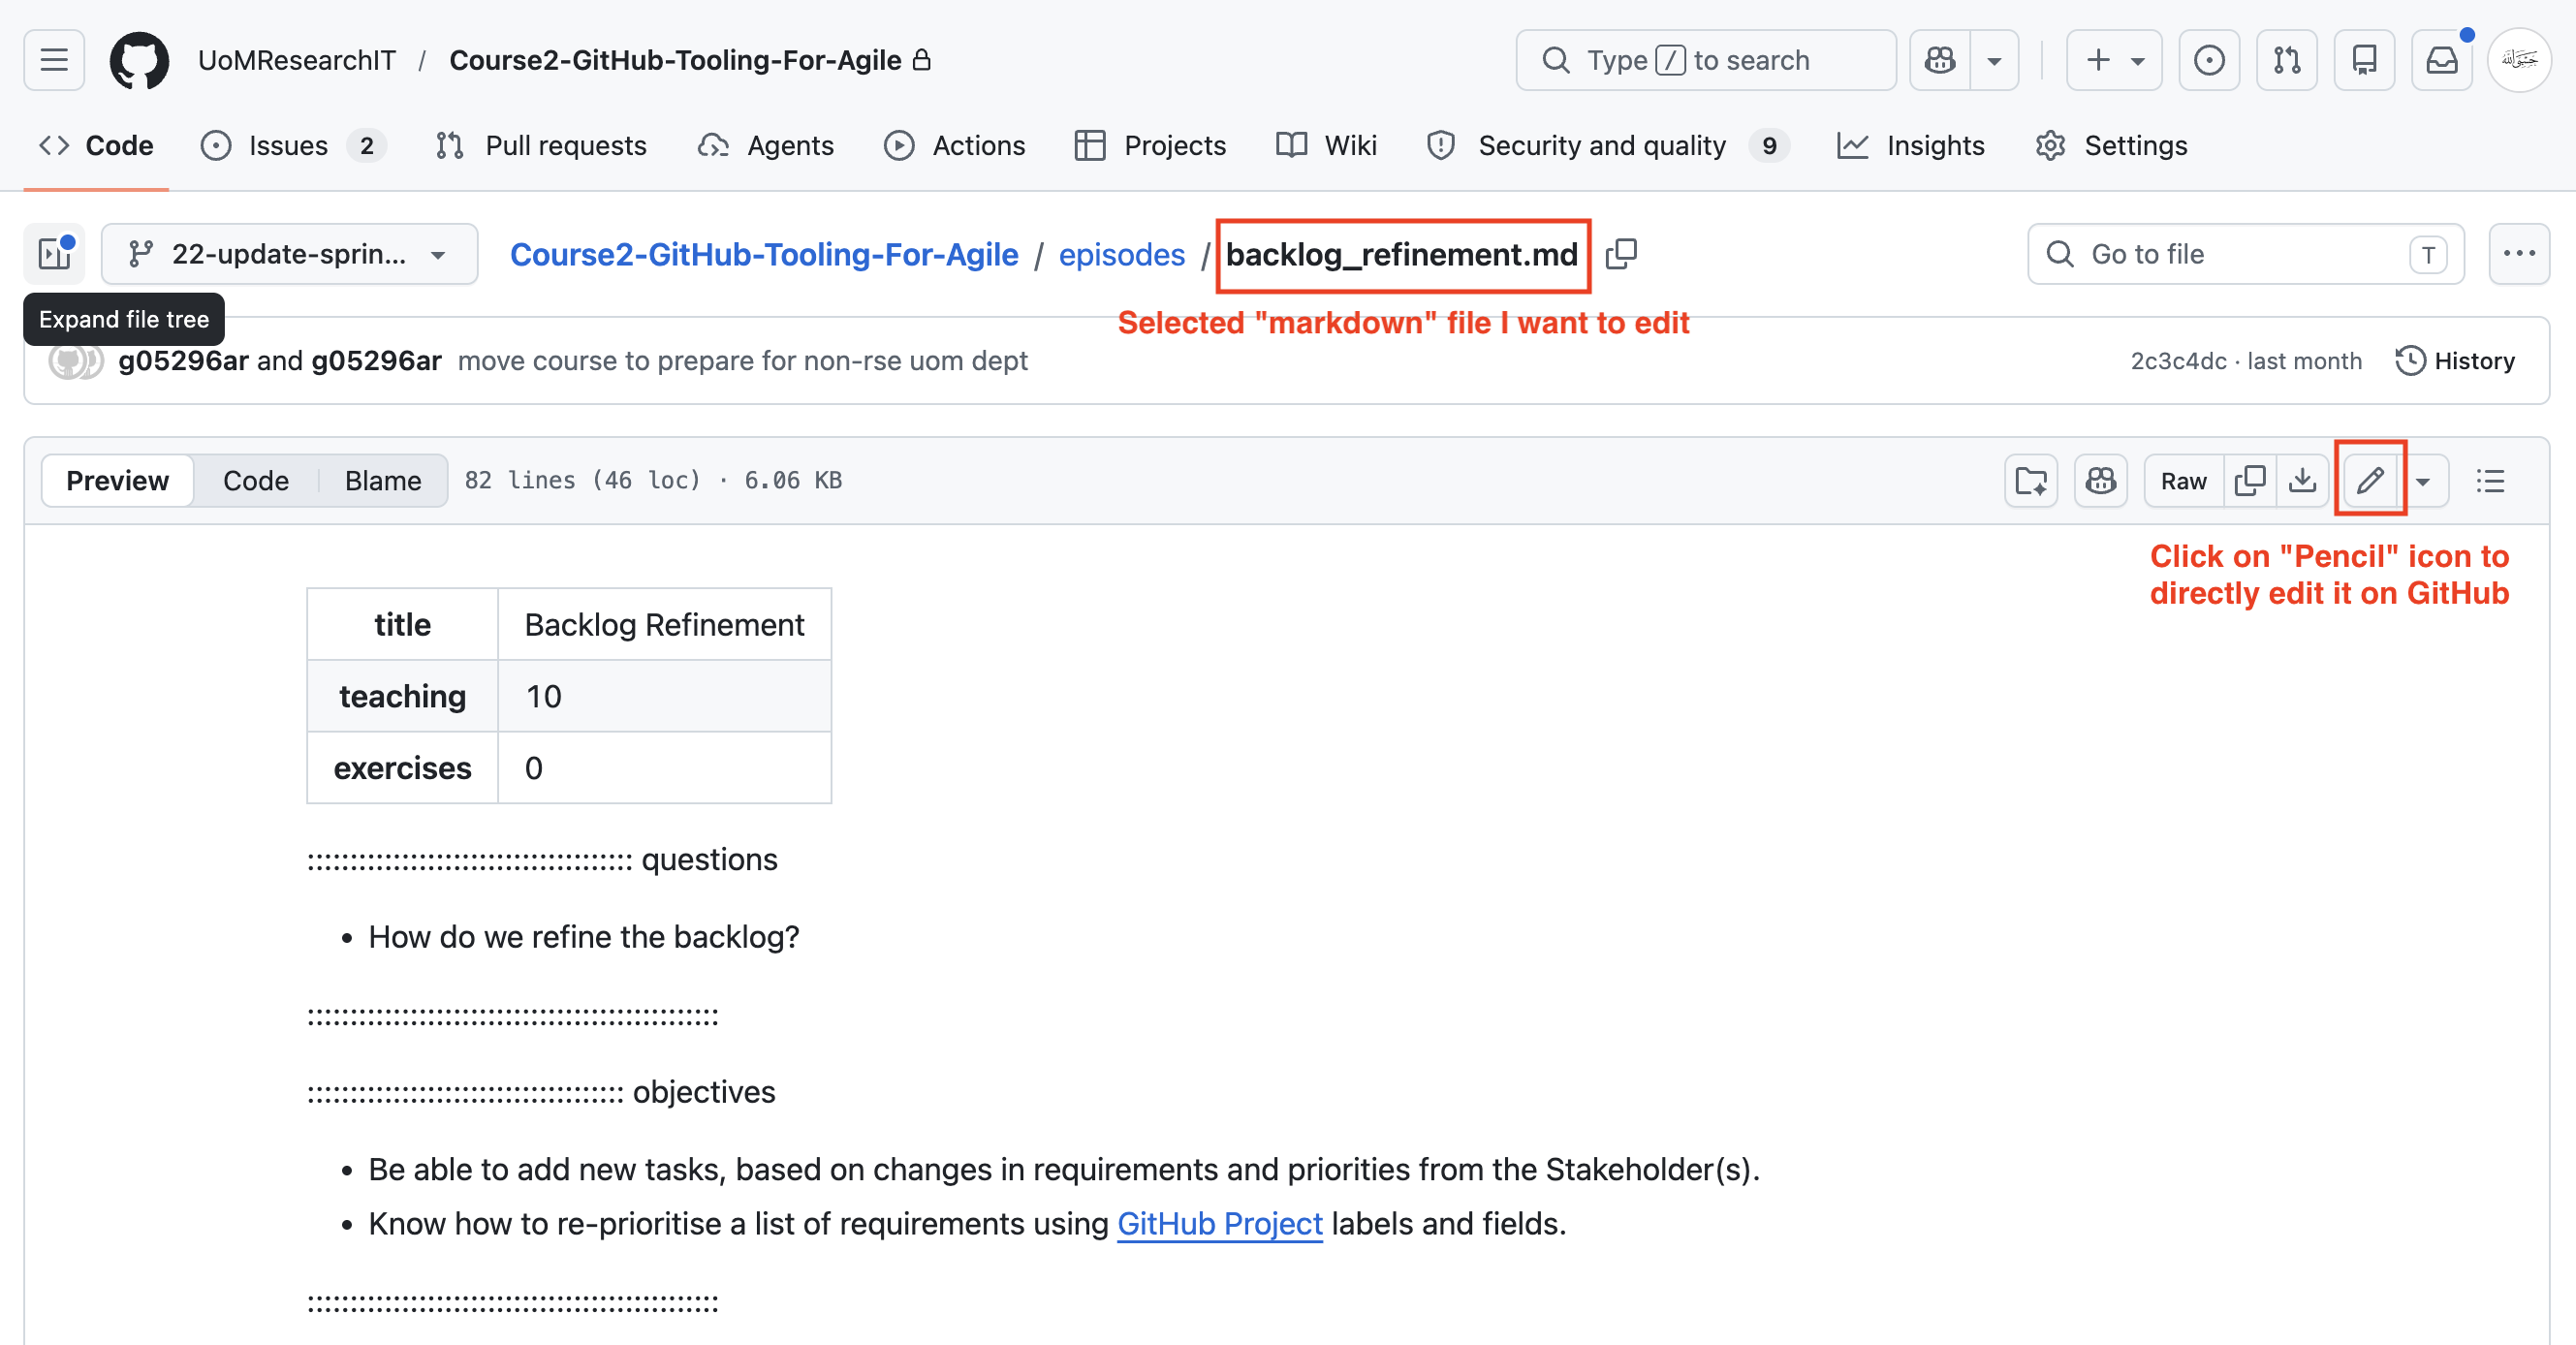
Part 2: How to Edit and Update an Existing File
Follow these steps in later sprints when your file already exists and you just need to add more data, section headings, or deep details.
📌 Quick Reminders for Beginners
-
Check the Path: Always look at the top-left text
string (e.g.,
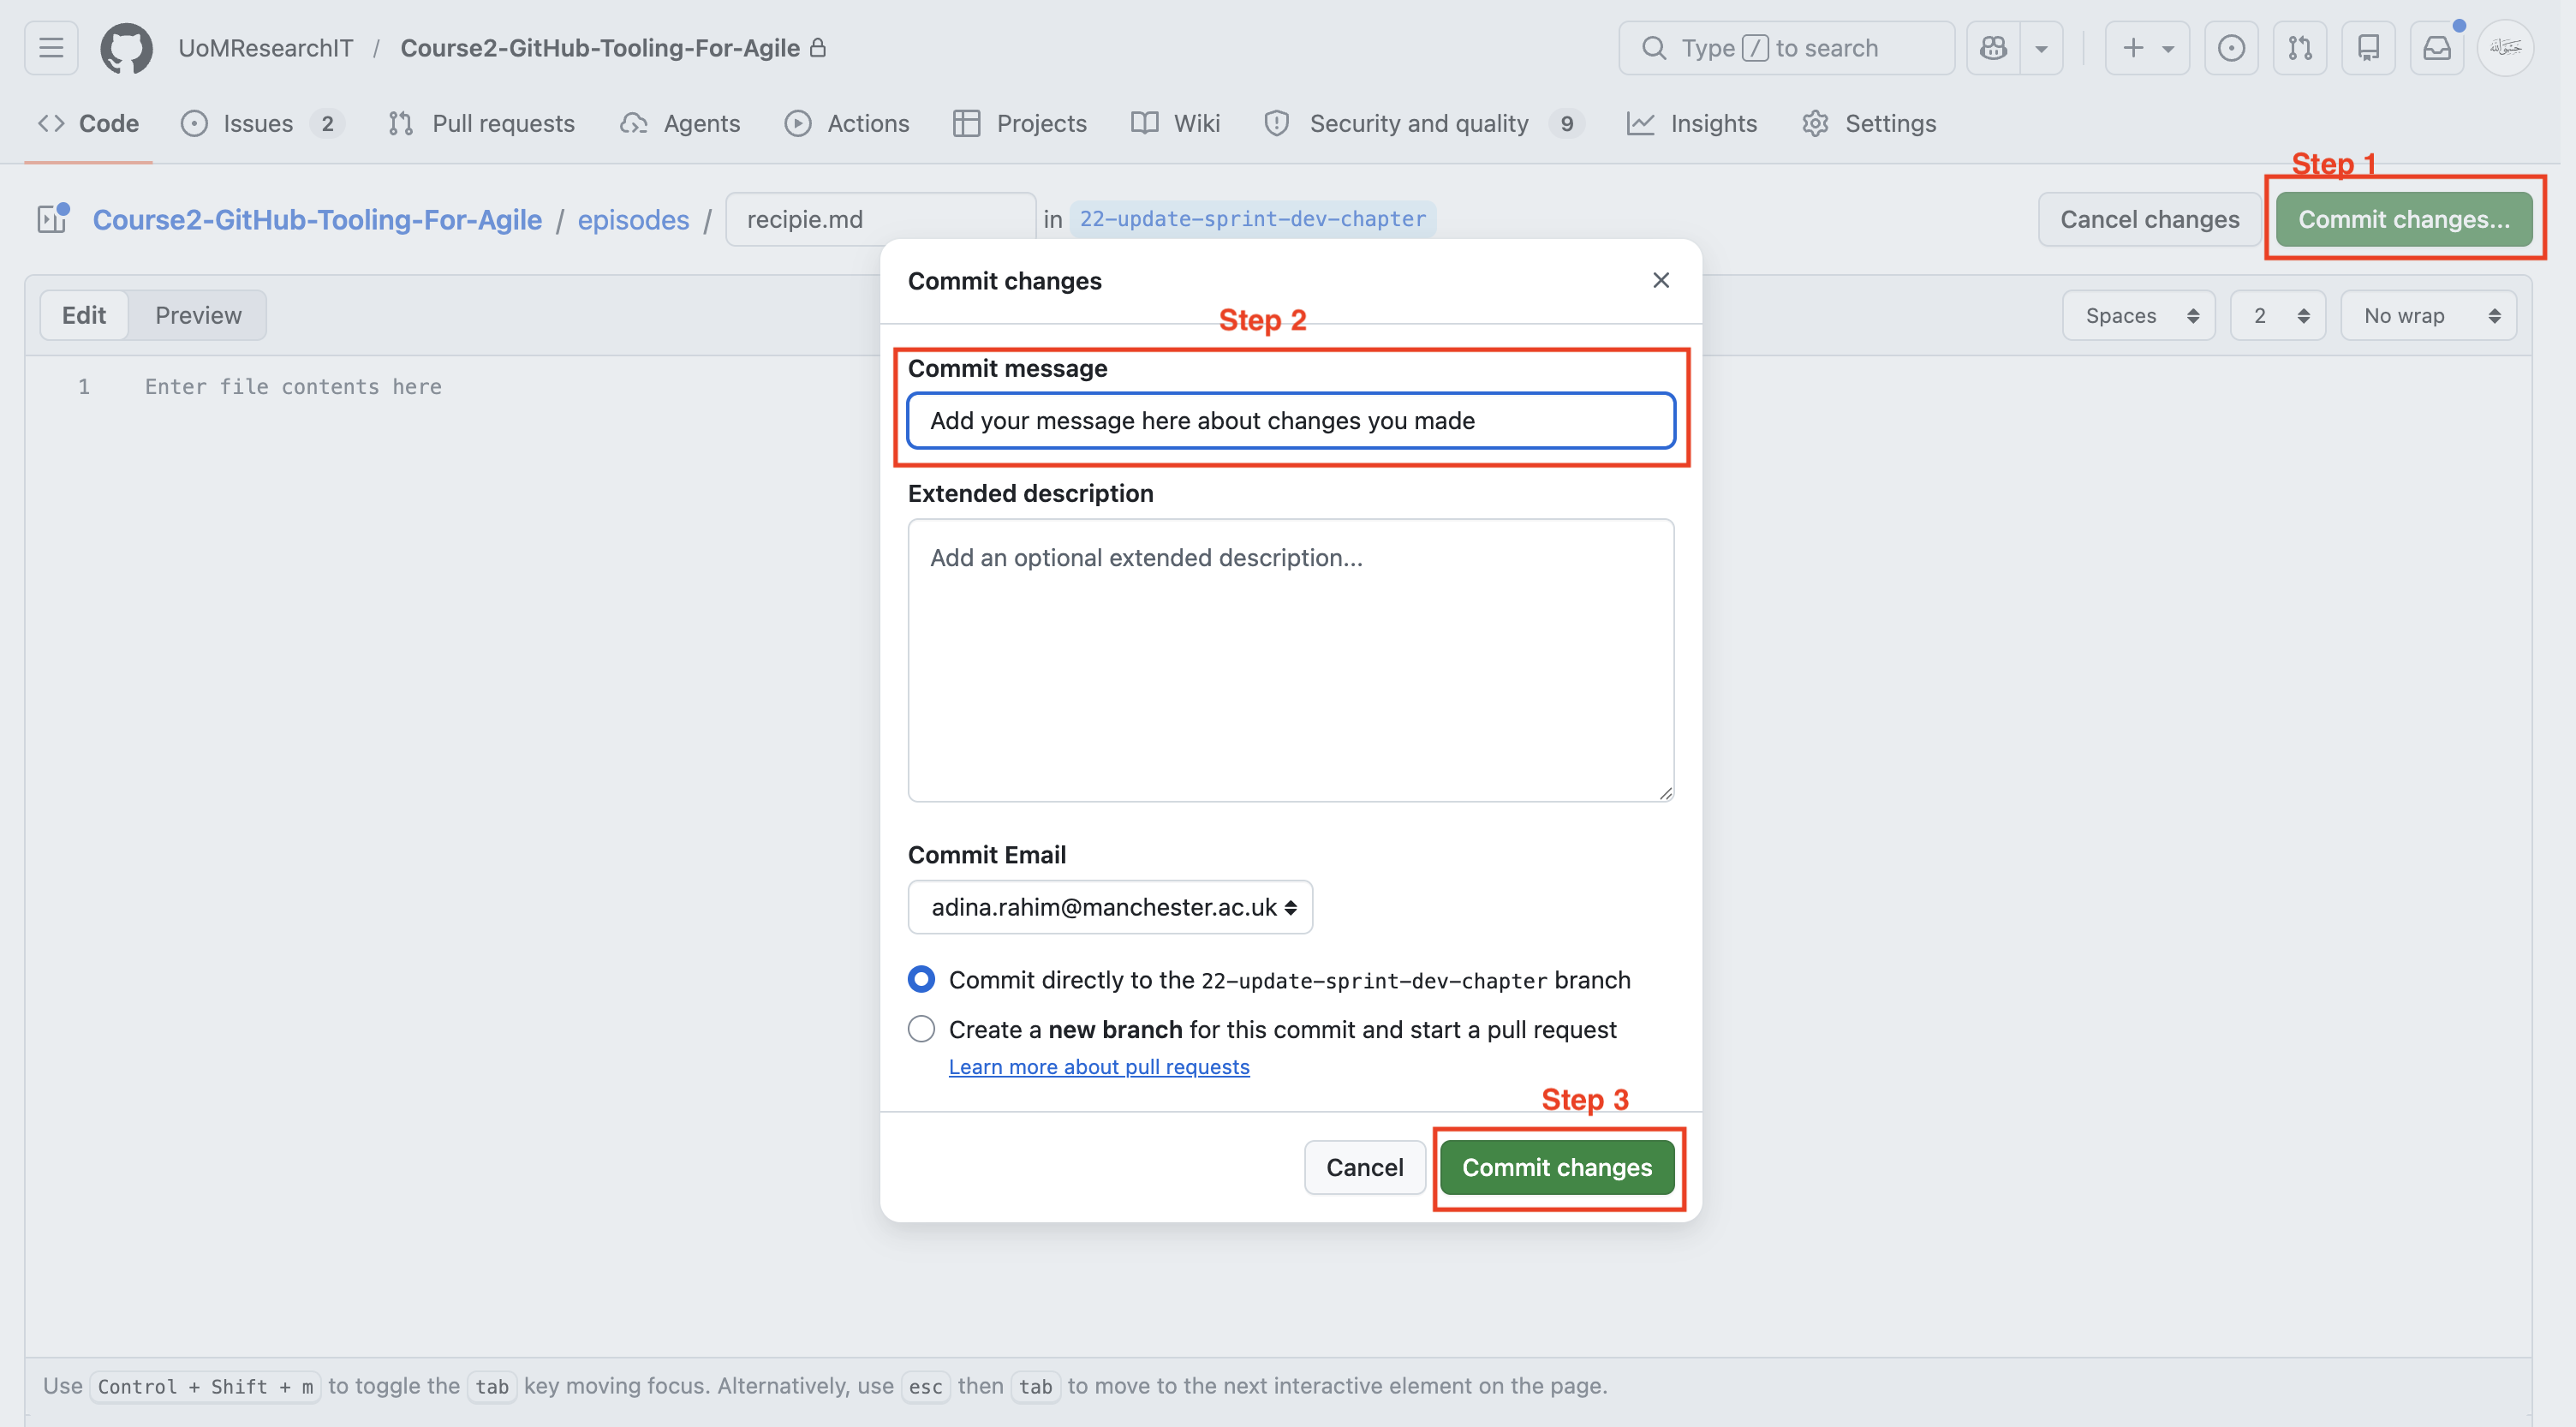
repository / folder-name /) right before you click “Create new file” to make sure you are in the right spot! - Commit = Save: In GitHub, the word “Commit” just means “Save.” Every time you commit, you are saving a permanent version of your work.
-
Don’t Forget the
.md: If your file doesn’t have.mdat the end of its name, the text formatting will look broken. You can always rename it using the pencil icon if you forget!